Additional Resources
Jenny says to feel free to contact her with questions or if you would like help with a project in the Portland or Tacoma area. Contact Jenny Ruthven at: jenny.l.ruthven@gmail.com. Read the July 27, 2011 Greening the roof: Tacoma resident’s DIY green roof is thriving by Rosemary Ponnekanti in The News Tribune and Linda Velazquez’s Sky Gardens “GPW: Ruthven Garage” Blog post of June 10, 2011.
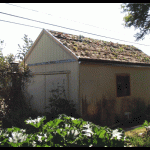
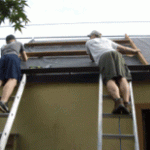
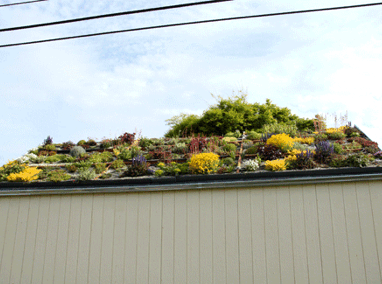
In 2010, Jenny Ruthven was a horticulture student at Oregon State University, and after graduating has found employment within the green roofing industry. She tells her story: “I wanted to design and install my own green roof, and my parents? garage seemed like the perfect spot. My parents didn?t take much persuasion. My mom already has a wonderful yard, so she figured green roofing the garage would make a lovely addition. The garage is quite old, so we first needed to add some additional structural support. We added in ceiling joists, collar ties, ledgers, vertical braces between joists and rafters, and plywood next to the double doors for increased vertical stability. Big thanks to my Grandpa, Jerry Ruthven for his help and ideas, and to Jill Sousa and Bob Drury for structural suggestions.
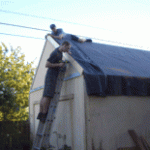
“Once we finished the structural support, it was on to the roof itself. We tore the shingles and tar paper off (they were put on 29 years ago, so it was the perfect time to do a re-roofing) and checked the plywood underneath to make sure it was still in good condition. We then stapled felt paper on top to protect the waterproof membrane from rubbing on any nails in the plywood. We had purchased a 20? x 30? piece of EPDM from Downs by the Pond in Eugene, and it was carefully folded then hefted onto the roof and unfolded.
“On either end of the roof we used 1 x 6 cedar boards. The membrane was wrapped up and over the boards, with metal flashing placed on top. On the front and back we used Trex boards with L-brackets that were screwed down through the membrane into rafters below every 2 ft. We used washers between the bracket and membrane and liberally applied waterproof caulking to seal it all up. The Trex were screwed in slightly elevated off of the membrane to allow water to drain under and into the gutters below.
“The roof is quite steep, with a 35 degree slope, so we needed to have some soil stabilization. We used pressure treated 2×4?s placed on end in a grid pattern to ensure minimal slumping of the soil. These were slightly elevated off of the membrane for drainage, and notches were cut to allow the soaker hose we would be installing to lay flat. We used L-brackets at each of the connection points, and metal straps at the peak to ensure that the boards don?t pull apart. Much thanks to Kevin Drost for help with the roof tear-off, waterproofing, edging, and soil stabilization boards.
“The planting day finally came. I decided to make my own custom made blend of soil which ended up consisting of about 52% inorganic and 48% organic. Inorganic was all pumice, with a bit of perlite thrown in. Half of the organic component was cedar grove compost, and the rest was coconut fiber, peat moss, mushroom compost, chicken compost, and steer compost. The soil depth is between 3-4 inches. It was about 4 yards total, and it was all mixed by hand on a large tarp, with help from Megan Ruthven and Shiori Oki. Thanks to Ross Drury for pumice and compost runs and the use of his truck.
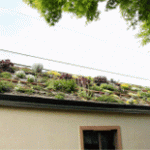
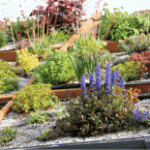
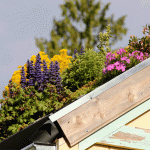
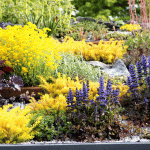
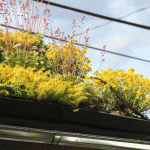
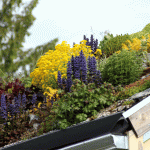
“My mom was in charge of the plants. We decided to use 4? pots and do 1 plant/sq. ft. She propagated about 75% of them herself in the months before planting, and bought the rest from Portland Avenue Nursery. She also did the planting design. We planted 432 plants, with about 60 different species and varieties total. There are 24 types of Sedums. Other plants include bugleweed, heather, ice plant, wintercreeper euonymous, purple leafed heuchera, candytuft, Lithodora, Bee Balm, and Black-eyed Susan. This is the most diverse green roof design I?ve seen, and since some of the plants are experiments, it will be really interesting to see how they do.
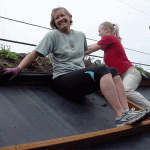
“It took a lot of 5 gal buckets to get 4 yards of soil up on the roof. Thanks to Jill Sousa, Lisa Snyder, Wynne Brown, Janice Mabin, and Jerry Ruthven for help in hauling and planting. We laid burlap strips between the rows of plants to help in water retention and to keep soil from potentially blowing away while plants are growing. Plus, the burlap will be a nice amendment to the soil as it decomposes.
“Also, landscape fabric was placed at the base of each of the horizontal boards before we hauled soil up so that water could run through but the soil would not. We used one 100 ft soaker hose per side, wrapped back and forth 4 times. We attached new gutters, which empty into a 55 gal rain barrel. At the moment we just use the house hose and attach it to each soaker hose, but I plan on getting a larger barrel with a pump in order to cover all of the irrigation needs.
“The total materials cost of the project was $4.18/sq. ft., which is really good! On a side note, the roof just had its first real rainfall. It rained .17 inches, and it had a 91 % retention rate!
“I spent a lot of time online researching green roofs and how to do the membrane, edging and soil stabilization boards. Brendan and I also went to the City of Portland Bureau of Environmental Sciences two day ecoroof seminar series, which we learned a lot at.
 Greenroofs.comConnecting the Planet + Living Architecture
